Park the Bus Tactic: A Solid FM18 Defensive 5-2-3 WB Formation
The last defensive tactic I created for FM18 wasn’t solid enough. Although when I tried it with some teams, some conceded around 25-35 goals. But they all conceded the least goals in the league, finally. However, the results weren’t satisfying. I had to create a better defensive tactic that concedes lesser than the prior tactic. This write-up depicts a solid FM18 defensive 5-2-3 WB formation; also known as the 3-4-3 formation in real life.
Antonio Conte (Chelsea’s Manager) and Nuno Espírito Santo (Wolverhampton’s Manager) are the two head coaches who inspired me with this 3-4-3 formation. They do make good use of it in the game. Their tactical pattern also influenced me to creating something that focuses more on defending.
Tactic: The 5-2-3 WB Formation
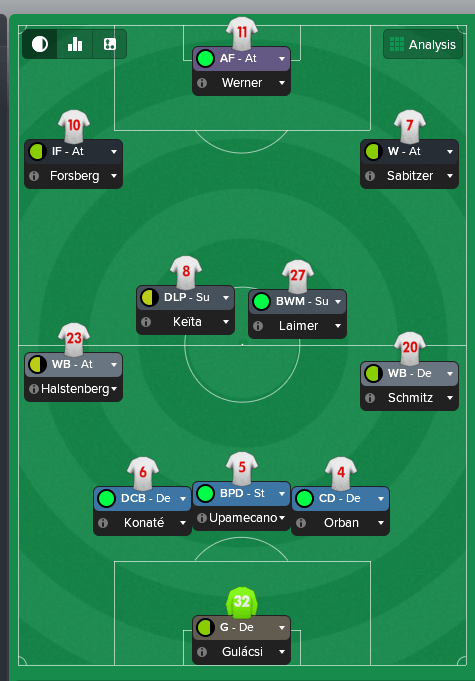
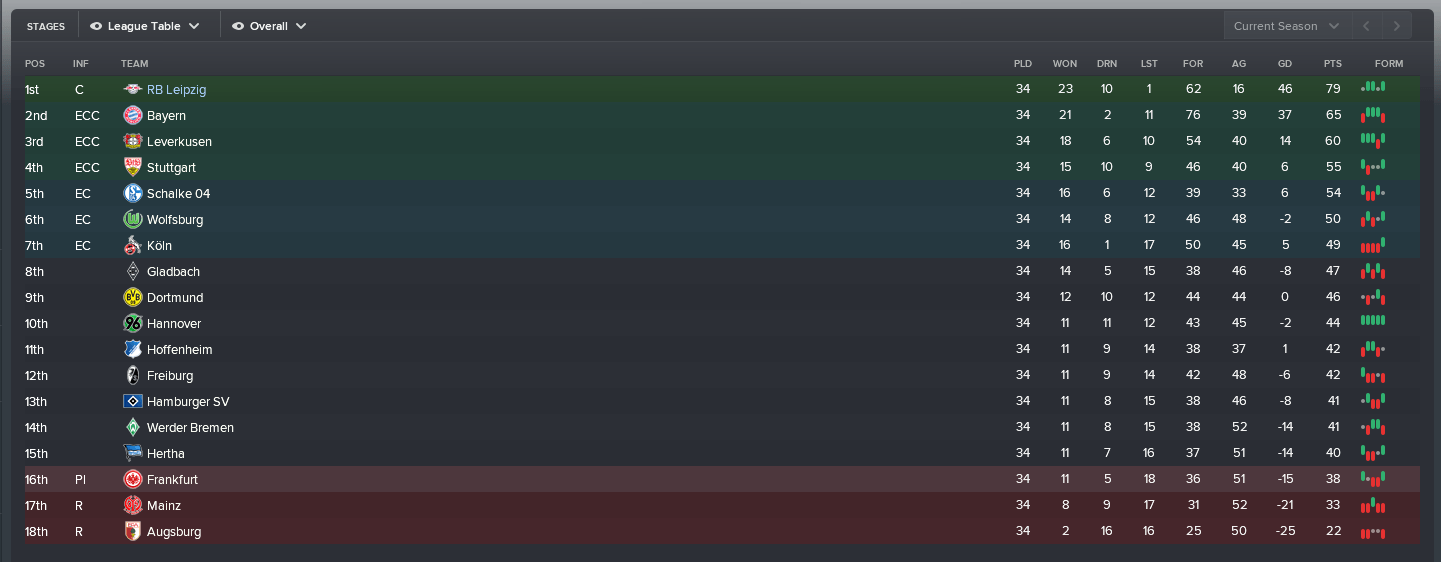
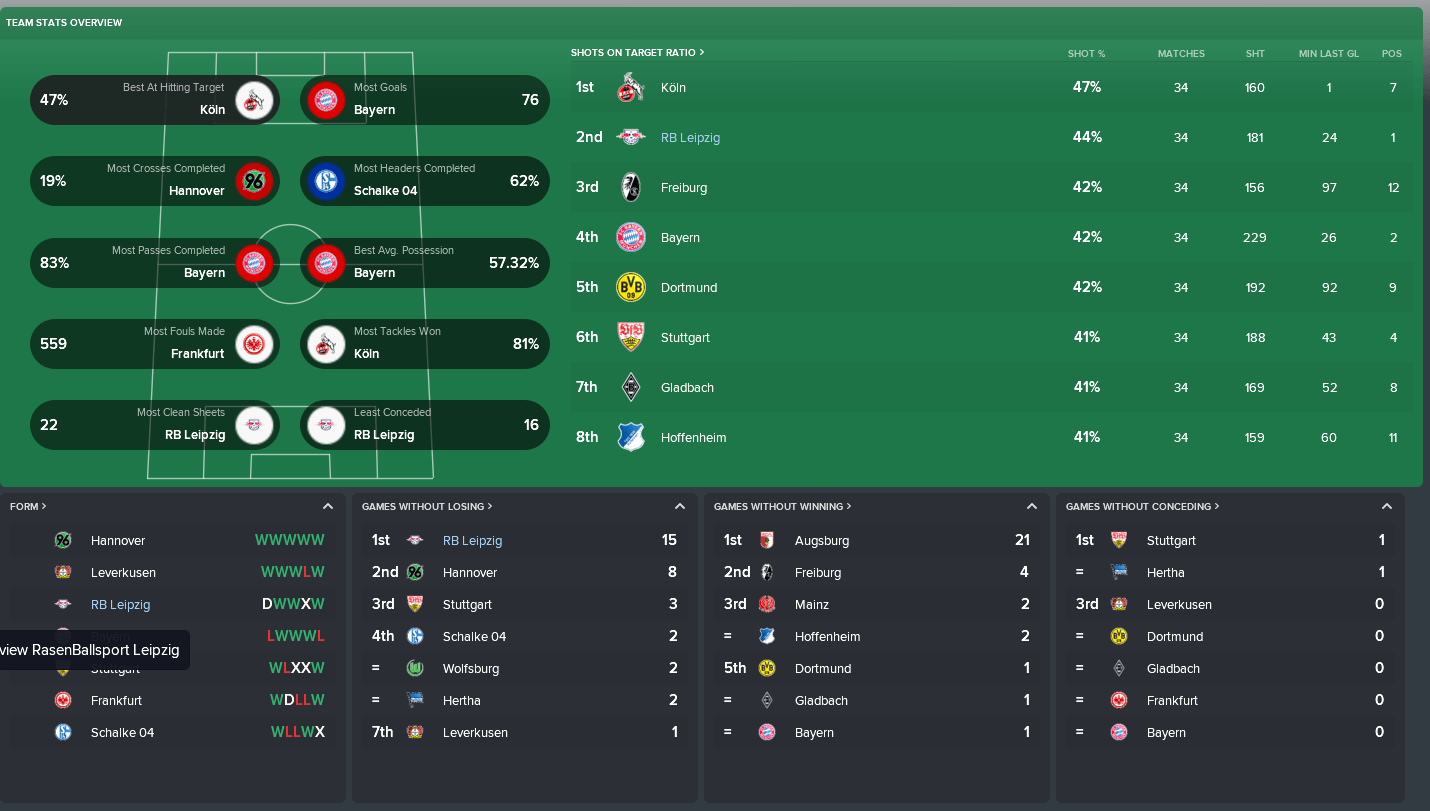
Although this tactic focuses more on defending, it has a good attacking feature. I had a great success in my first season with RasenBallsport Leipzig. This tactic was so successful that the team unlocked the Park The Bus achievement in FM18. We went on five straight games without conceding any goal. With this result, I regard this tactic as my “park the bus” style of play.
Moreover, one of the reasons I achieved such a success with RB Leipzig is the physical nature of the squad present. They have one of the best young physical players in the game. And any team with good physical players performs very well with this tactic.
Also, this tactic is aggressive, but not too aggressive. You might need to instruct a booked player to ease of tackle, or substitute him to avoid a red card.
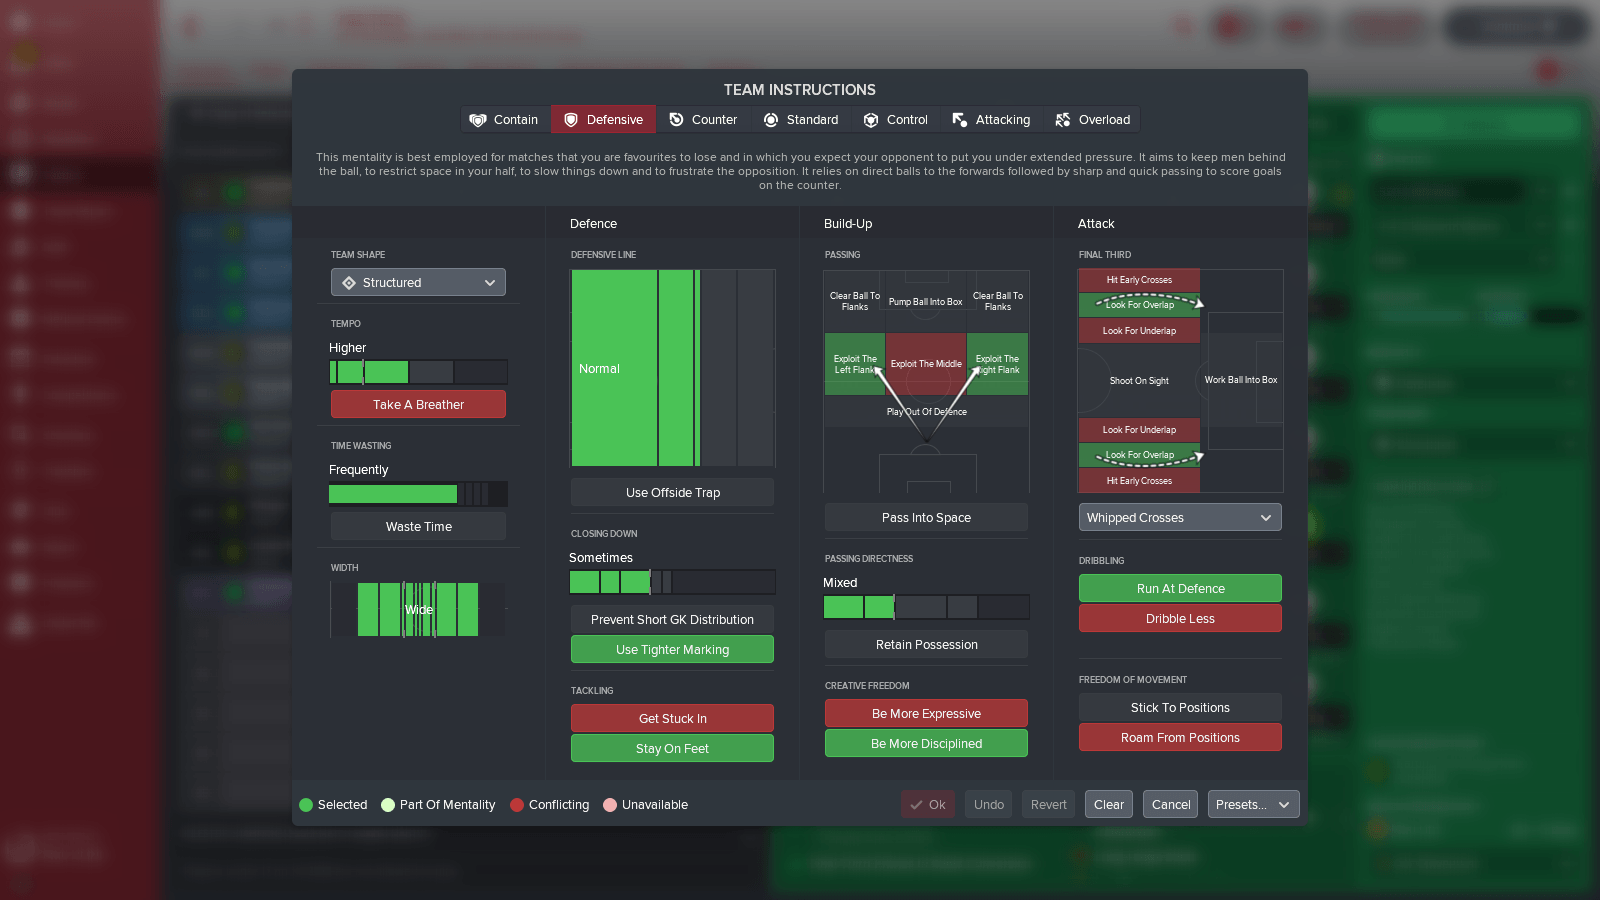
The team instructions are quite simple. The team can play in defensive mentality. But you can use counter or standard, depending on 3 things: the opponent you’re facing, the situation of the game, and the ground your team’s playing (home or away).
However, I opted for a structured team shape. This makes each role to focus mostly on one phase with very little engagement in another phase. For instance, the defenders (in any of the roles) will only focus on defensive phase without engaging in transition or attacking phase. This shape improves defensive positioning, which is the main aim of this tactic. In other words, the tempo is high in order to influence counter. And the full width of the pitch exploited.
Touring the defensive section, the defensive line stays normal. The team closes down sometimes while using a tighter marking. Before, I enable get-stuck-in. But the amount of bookings were getting too much because of the aggressiveness of this tactic. So, I decided to switch to stay-on-feet to reduce that amount.
The build-up section holds a few instructions. The team will carry out a more intensive attacking mentality from the left and right flanks. The passing directness mixed. Be-more-disciplined makes the team play as a strong collective group.
Finally, from the attacking side, look-for-overlap instructed. Because I have wingers with good dribbling and pace abilities, I activated Run at Defence. You can choose any type of crossing you like.
Roles and Duties
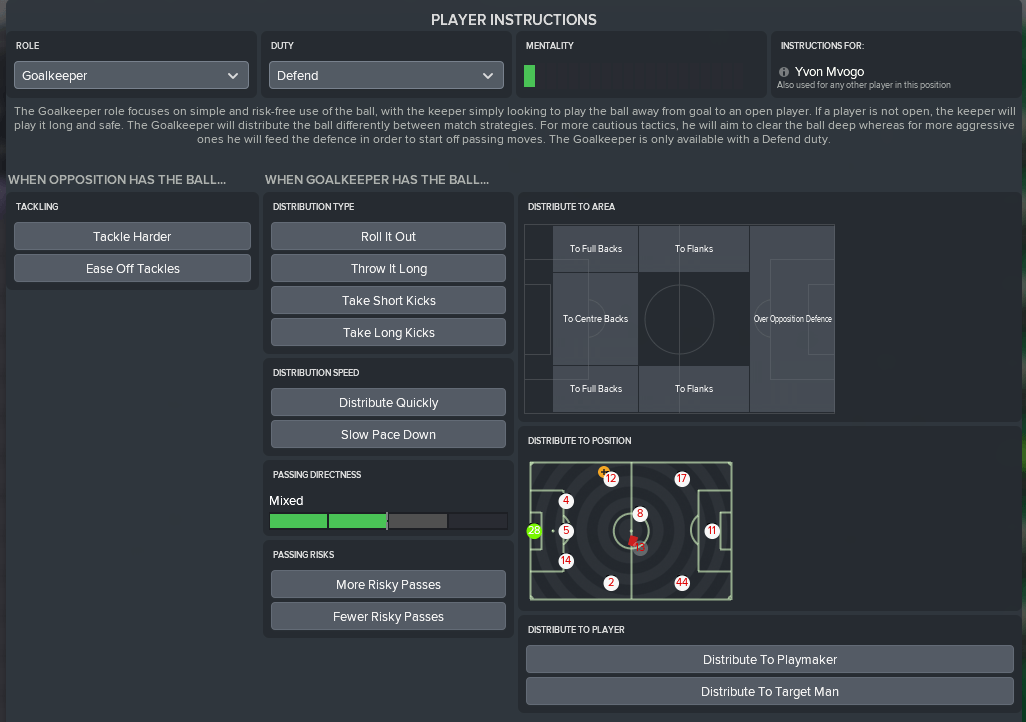
Keeper: Goalkeeper (Defend)
It’s just ideal to use the goalkeeper role in this aspect.
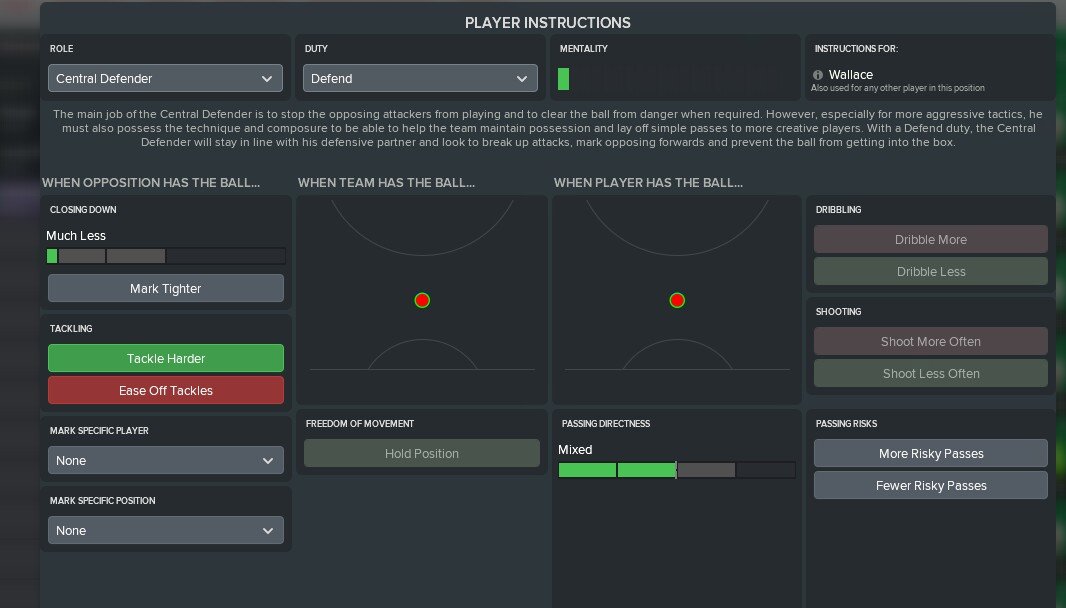
Central Defence: Central Defender (Defend), Ball Playing Defender (Stopper), and Defensive Centre Back (Defend)
The Central Defender’s (CD) job here, since this is an aggressive tactic, is to help maintain some amount of possession by engaging in simple passes. Defensively, under a structured team shape, the CD holds position and focuses on breaking up opposition attacks.
The Defensive Centre Back (DCB) in this tactic does the same job as the CD. He helps in breaking up attacks. But, makes clean tackles and clears the ball safely up field. Sometimes, such up field clearance can start an effective counter-attack. Besides that, the DCB doesn’t help in maintaining possession, which is not needed here.
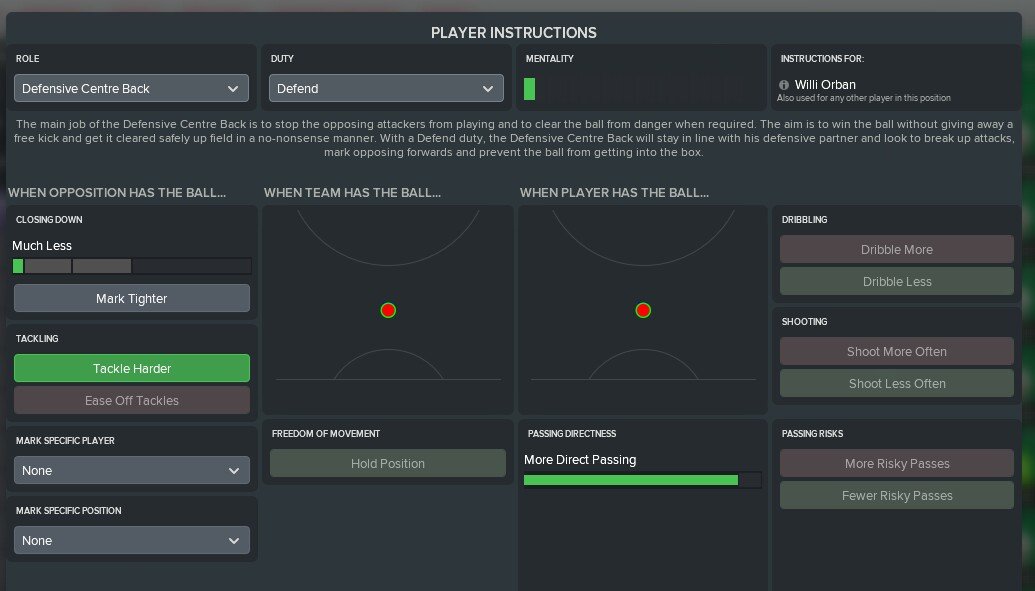
In the ball playing defender (BPD) role, the assigned player can make good passes and comfortably hit through balls to the attacking wingers for them to press forward. This type of defender has the confidence to hold the ball a little before making a decision. However, with the stopper duty, he stays ahead the defensive line in order to close down the opposition central attacker. And because I don’t have a defensive midfielder, I opted for the stopper duty. Sometimes this defender operates in the space of a defensive midfielder to close down the opponent.
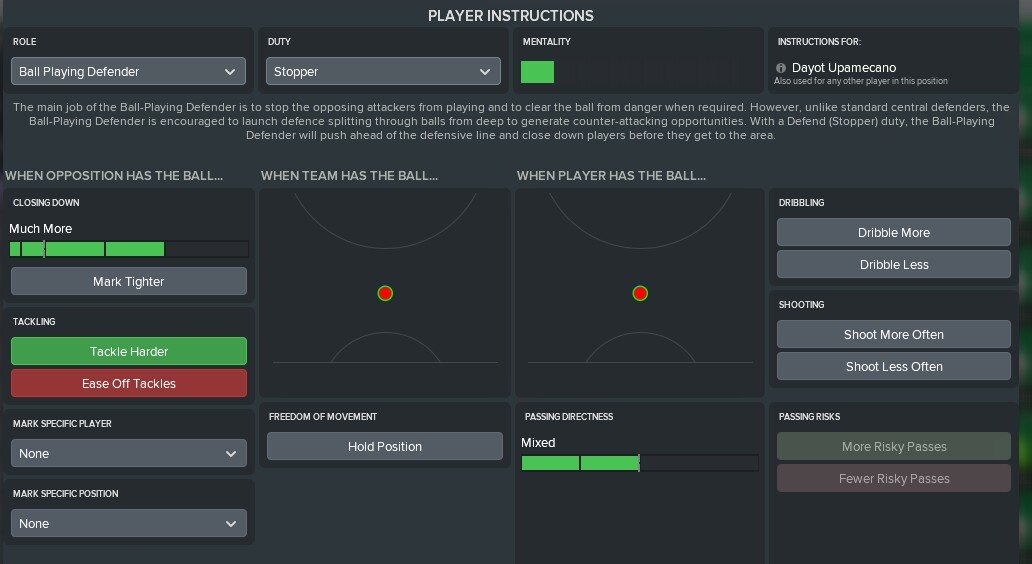
Side Wing Backs: Wing Back (Attack) and Inverted Wing Back (Defend)
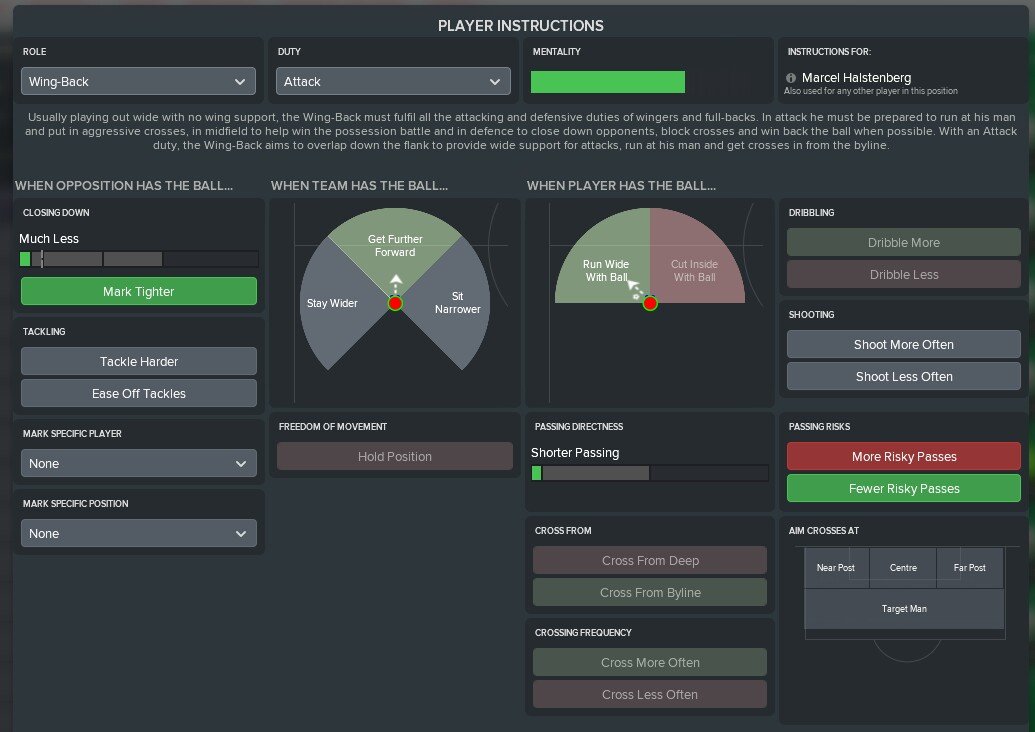
The Wing Back’s (WB) main responsibilities are to close down the opponent, win back the ball, and block crosses. But with the attack duty, the assigned player gets forward toward the by-line to support the team’s attacking phase. Here in this tactic, the WB always stays wide and makes dangerous crosses from the flank.
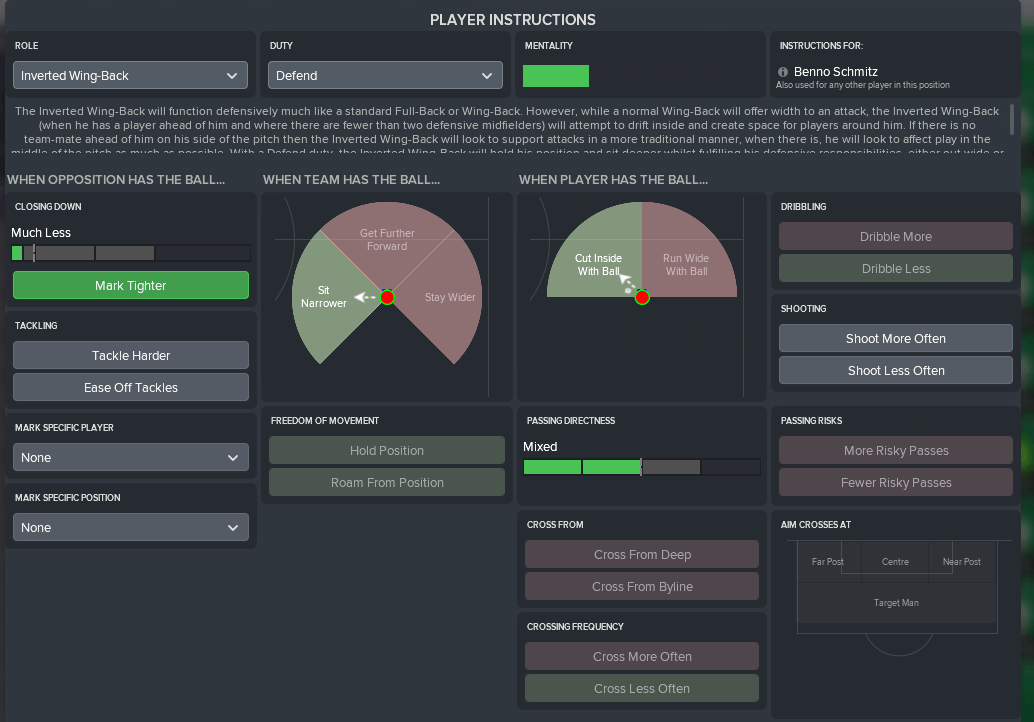
In the other hand, the Inverted Wing Back (IWB) is a side defender that sits narrow and utilizes the central area of the pitch. I chose this role because the team partially needed an extra body in the central midfield when the team attacks. A role that can stay in position to recycle play is also part of the reasons for choosing IWB in this tactic. With the defend duty, he holds position and carries out his defensive responsibly out wide or further inside the pitch.
Central Midfield: Deep Lying Playmaker (Support) and Ball Winning Midfielder (Support)
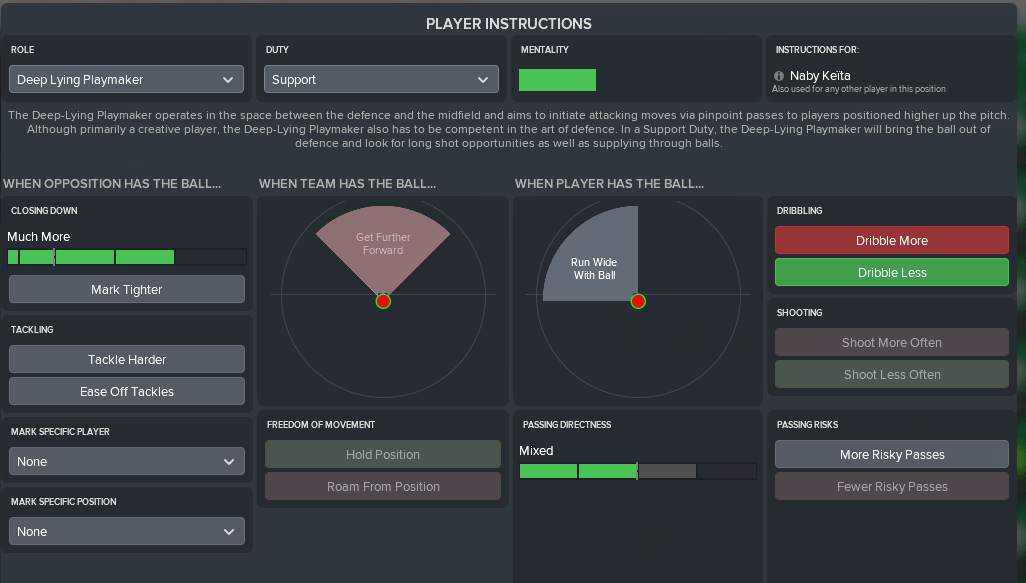
Here in this tactic, the Deep Lying Playmaker (DLP) operates in the space between the midfield and advance midfield. With the support duty, he moves forward a bit. The assigned player is like an all-round midfielder who can dominate the midfield, and improve the connection between the defender and striker. However, he controls the transition phase of this tactic and sets decisive passes to the forwards.
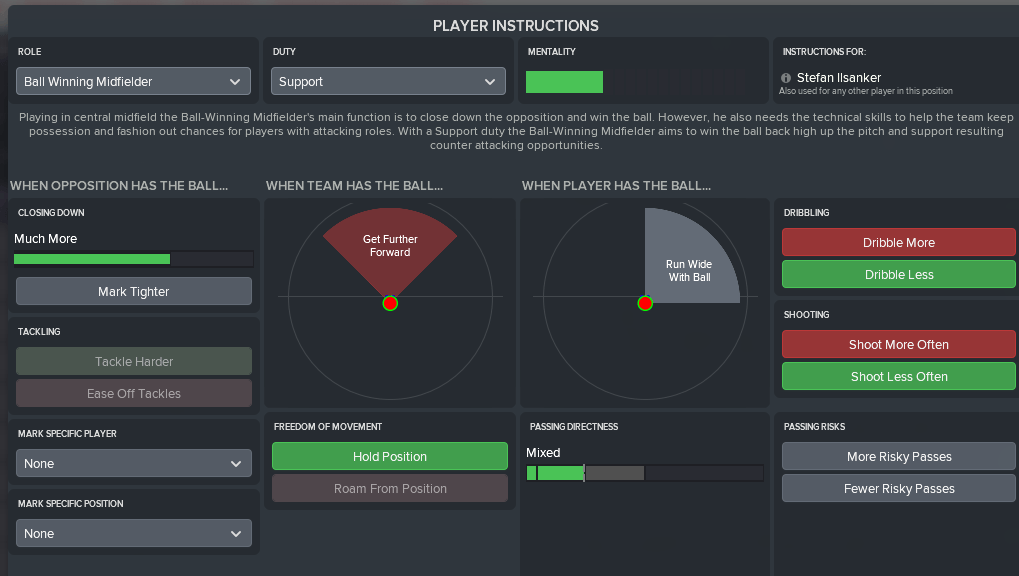
The Ball Winning Midfielder’s (BWM) job is to close down the opponent in an aggressive manner. His presence in this central midfield is really important. The ways he throw himself at an opponent, giving his man a unbreathing space, and trying to win back the ball actually bring some stability in the team’s midfield. The support duty makes him an asset during counter-attack.
Side Attacking Midfield: Winger (Attack) and Inside Forward (Attack)
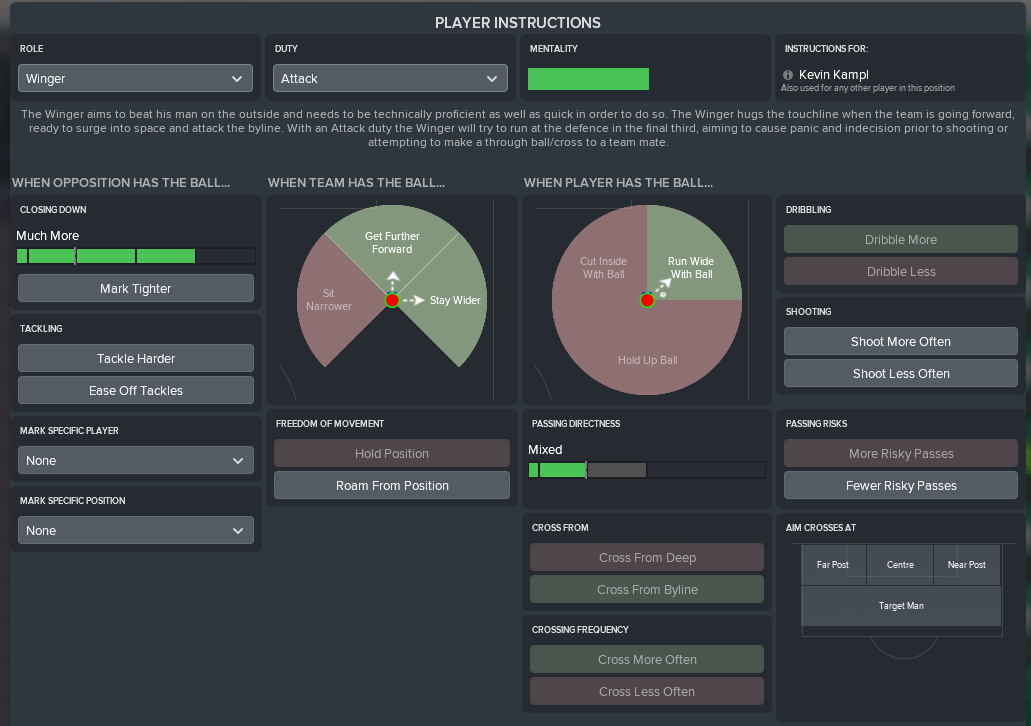
The attacking strength of this tactic rests mainly on the attacking Winger and Inside Forward. For the winger role, the player must be quick and good at dribbling because he must beat his opponent as fast as possible to create a scoring chance for the striker. He operates in the wide area and mostly delivers crosses to the striker and attacking inside forward.
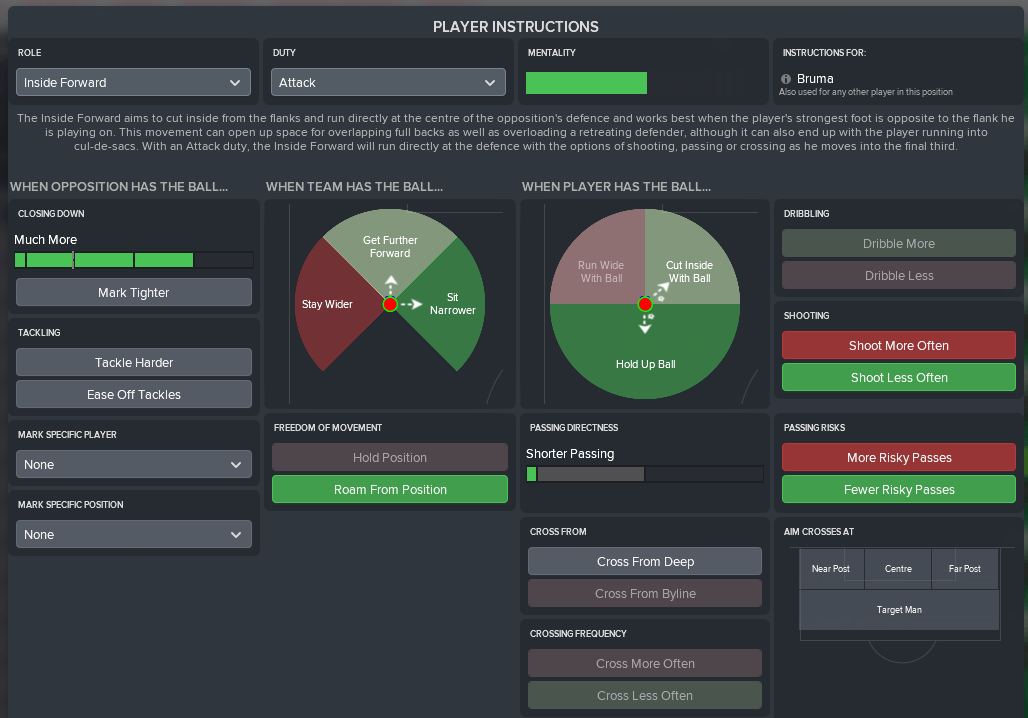
The Inside Forward (IF), with the attack duty, drifts inside as quickly as possible to provide killer balls for the striker or hit the target with a curling shot. He can assist in winning back the ball from the flank if you engage him in specific marking; will discuss this later in this article. As an attack-minded player, he always arrives early in the opposition box when a cross is made. If the striker misses a great cross, the IF makes good use of the cross.
Central Forward: Advanced Forward (Attack)
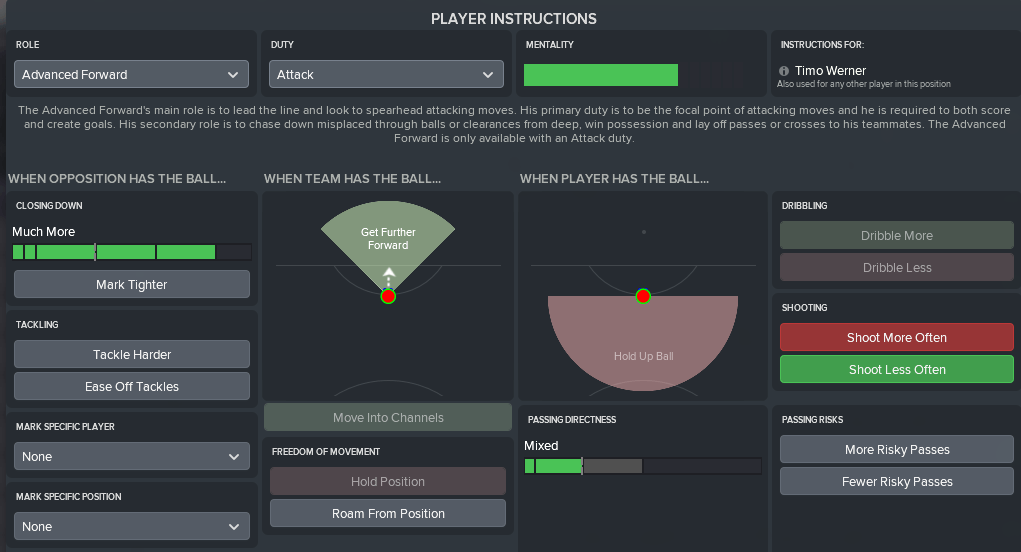
In this 5-2-3 formation, I find the Advanced Forward role most suitable. The assigned player is like an all-round attacker. He can score, create chances, and cross balls. He can operate in both wide and central areas.
Training
Most times I do leave the general training to my assistant manager while I handle the individual training. But in case of developing abilities, you need to focus on training that builds the team’s physic if you have a lot of technical players.
However, your match preparations should be set to Attacking movement. That’s the area that usually needs improvement in this tactic. Generally, a good tactic should be able to defend and attack as well, not only defend.
Specific Marking
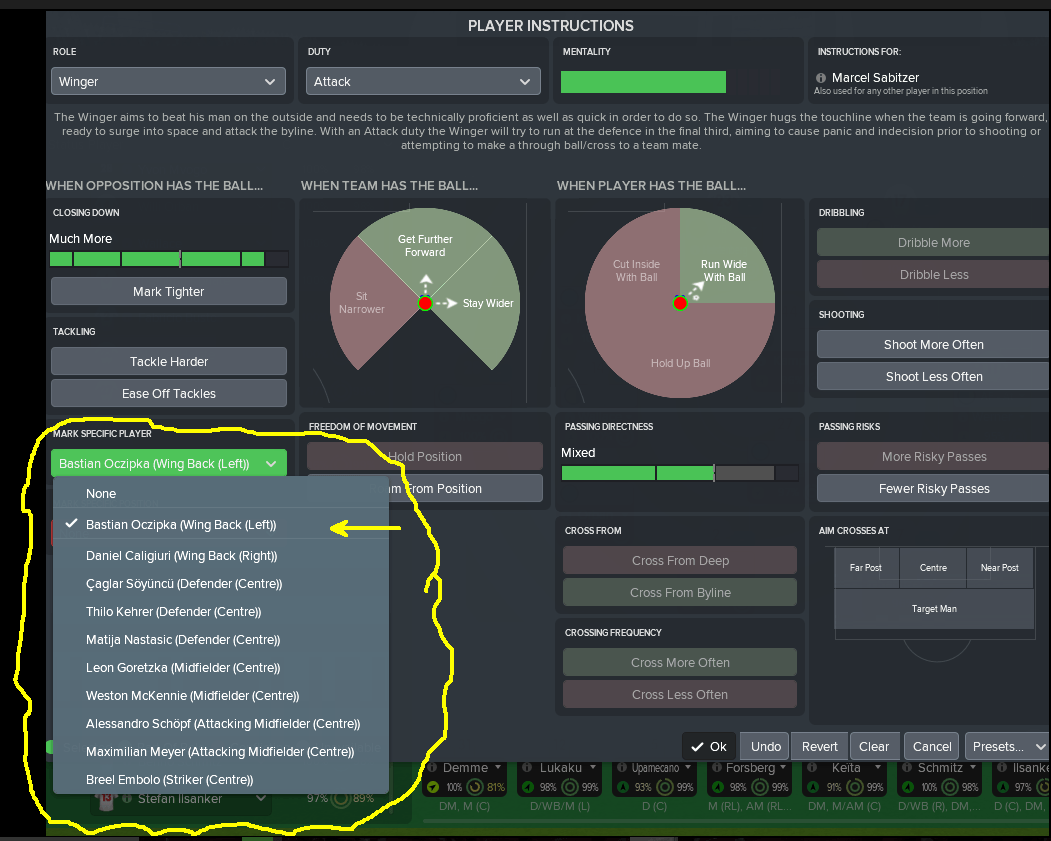
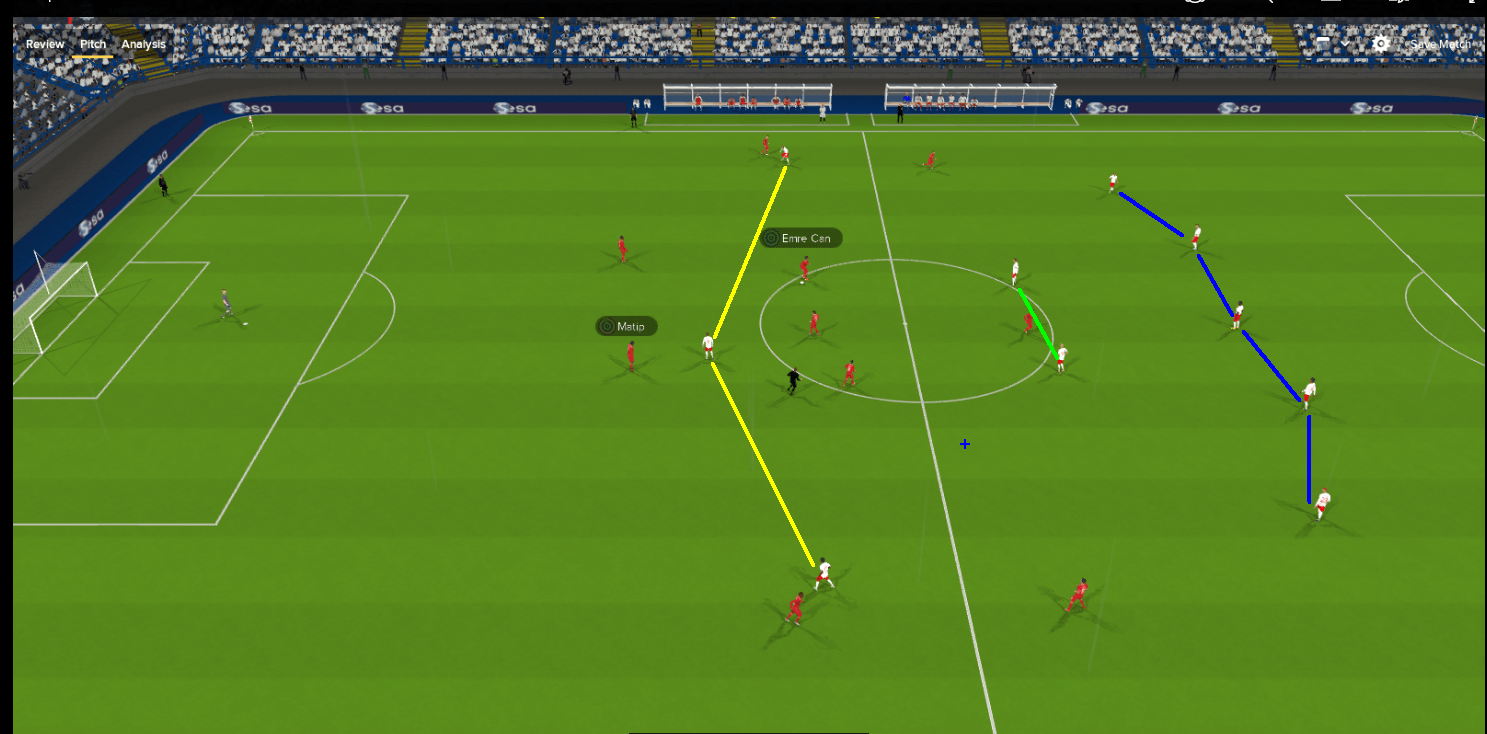
Like this my prior tactic, this tactic requires a bit of man marking to enhance defence. The inside forward and winger are engaged in this aspect. From the formation, the winger is at the right side. Therefore, he has to man mark the opposition left fullback or wing back. Conversely, the inside forward marks the right fullback or wing-back . The screenshot below shows an example.
Opposition Instructions
This tactic doesn’t need opposition instructions. But, you can still create a befitting setting of your choice and apply it. Or, you can listen to your tactical coach’s advice.
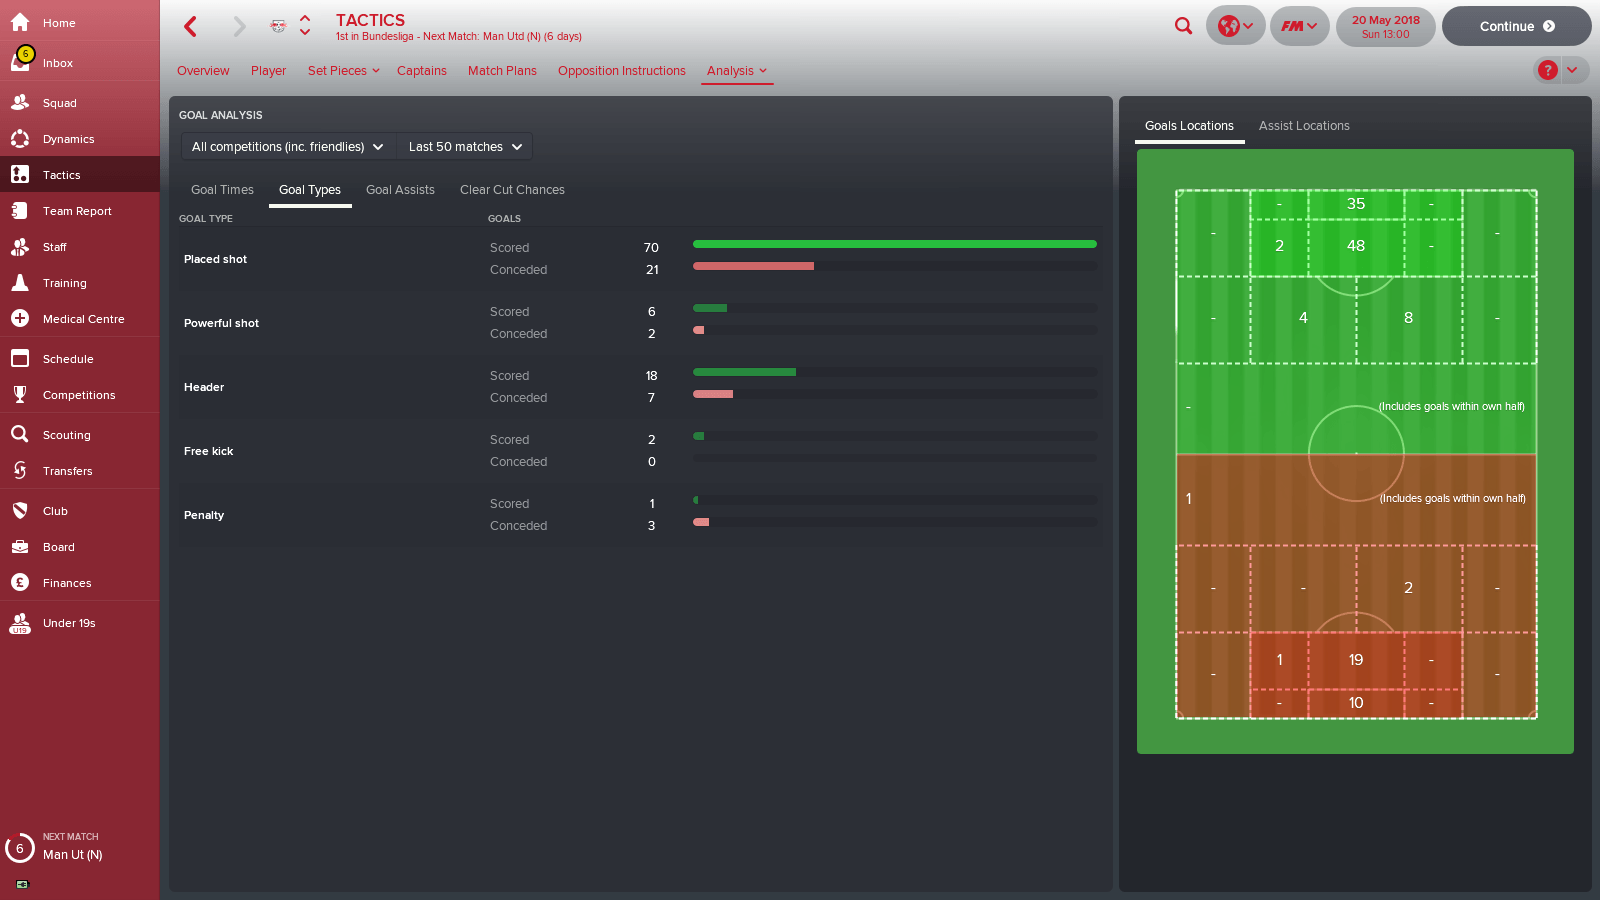
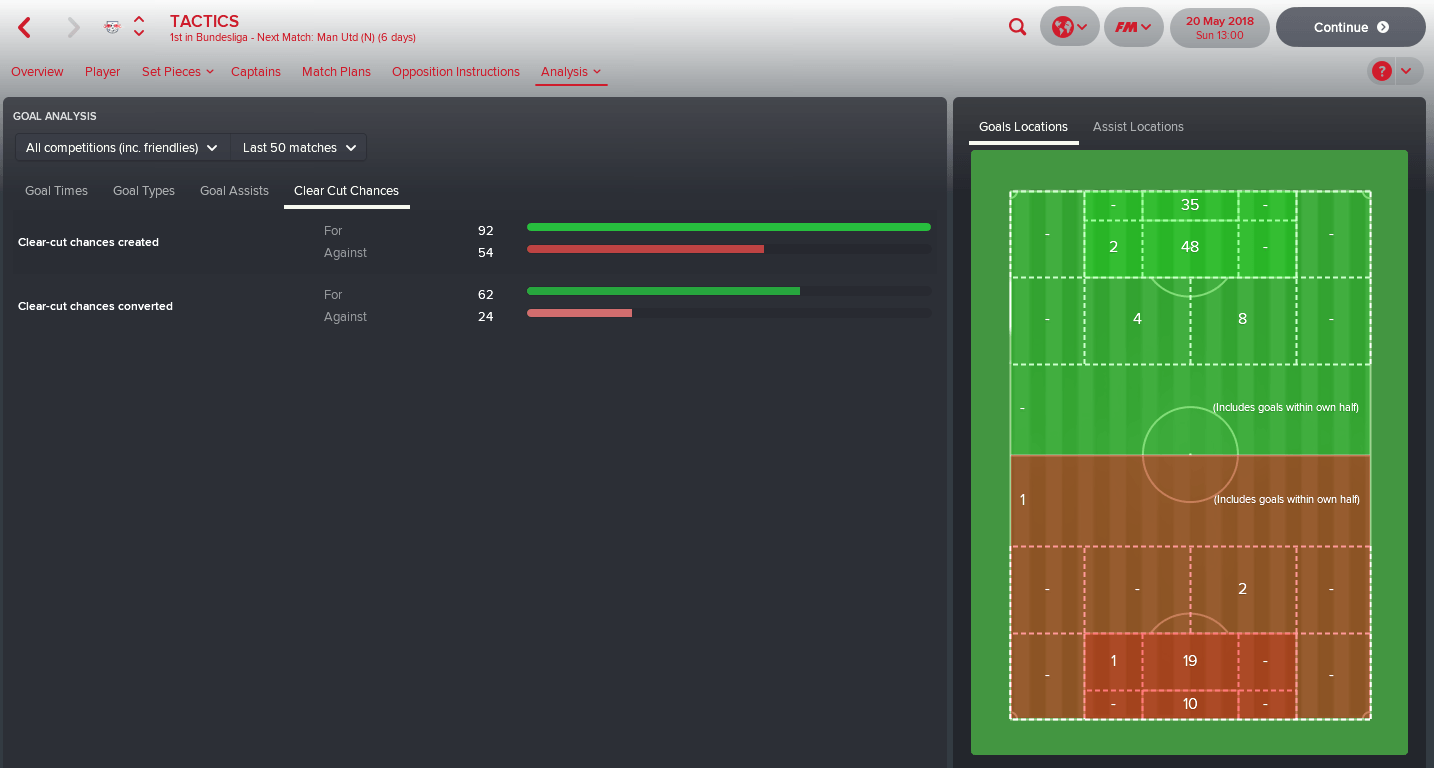
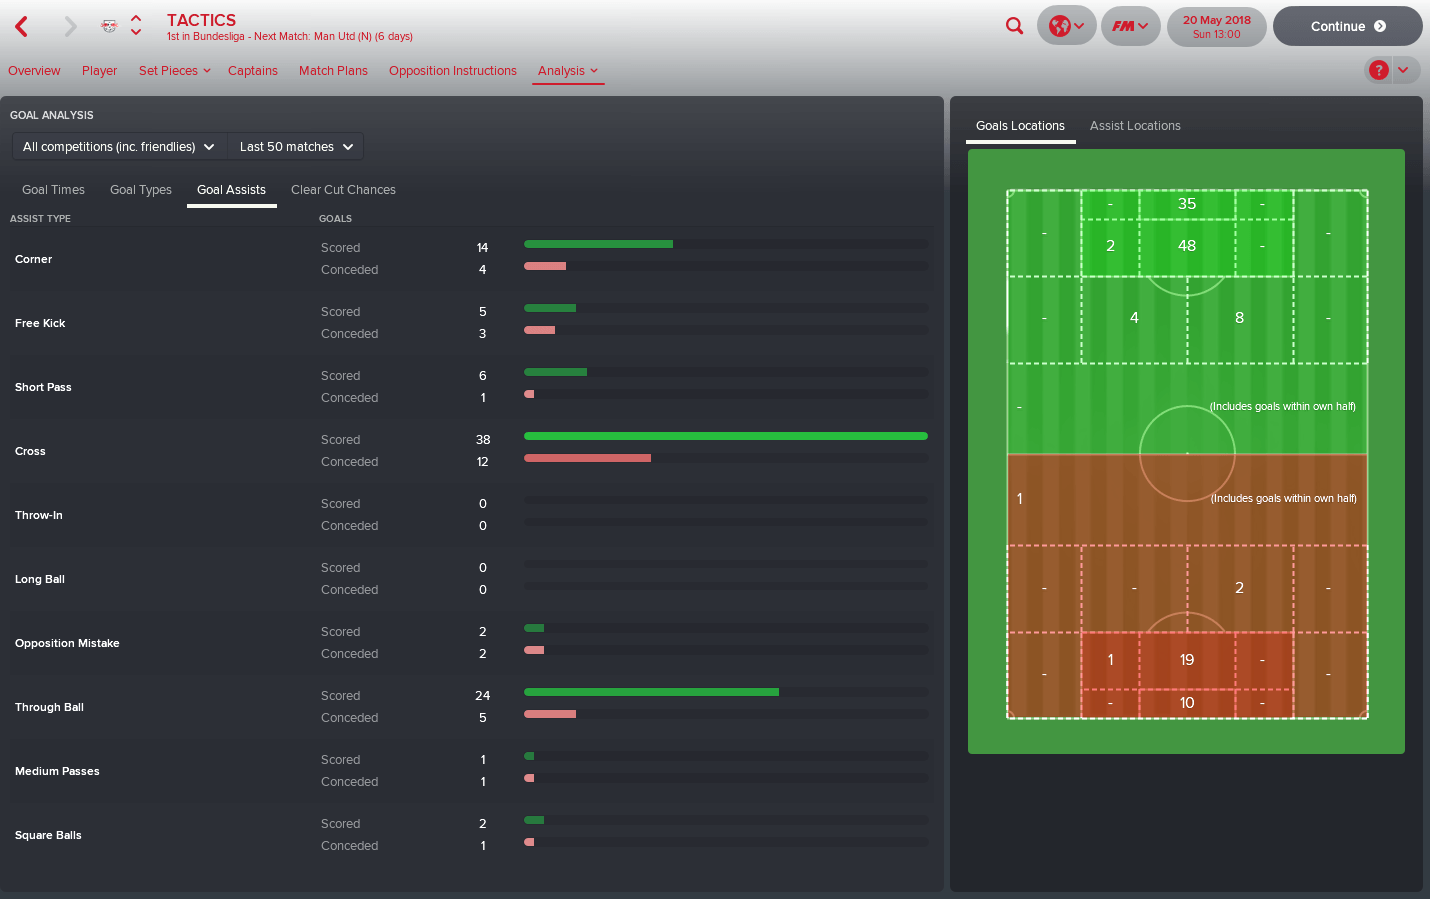
Results and Stats
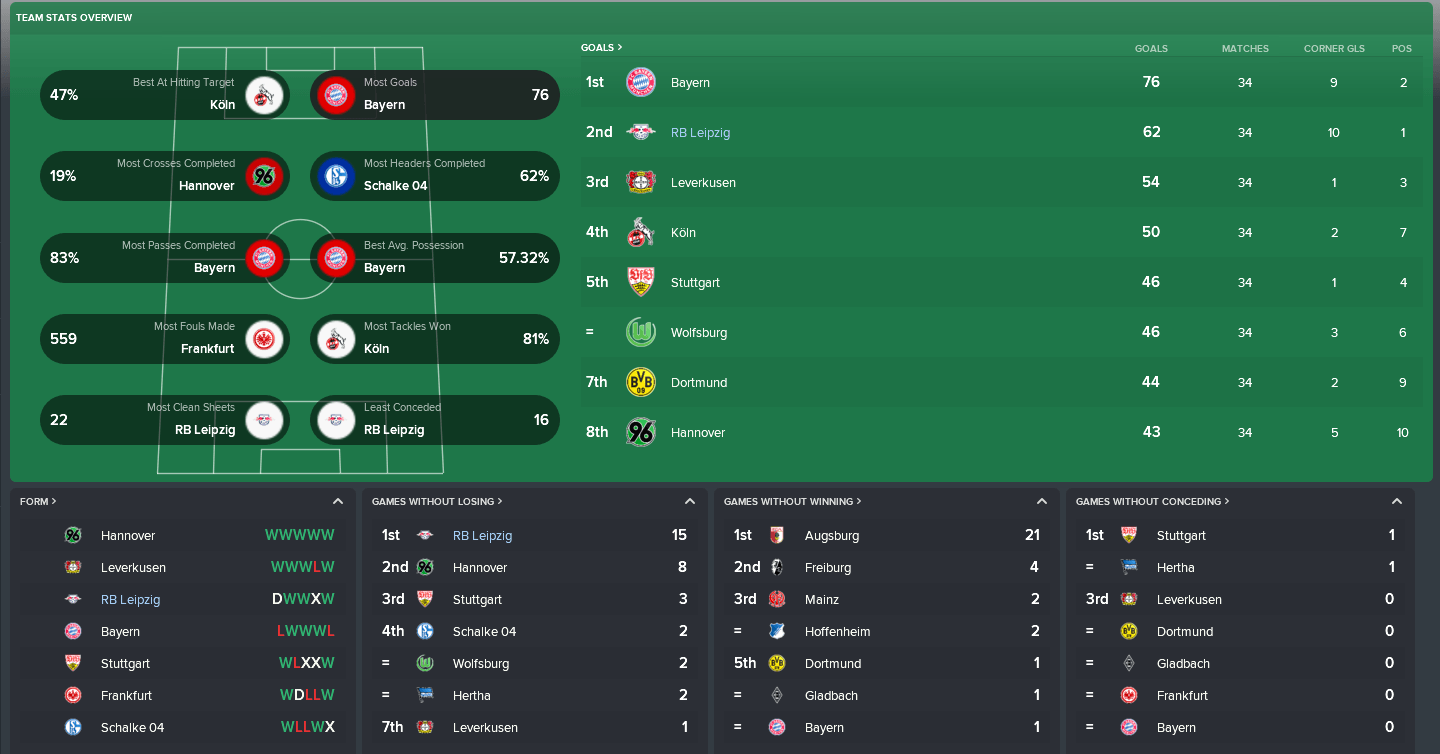
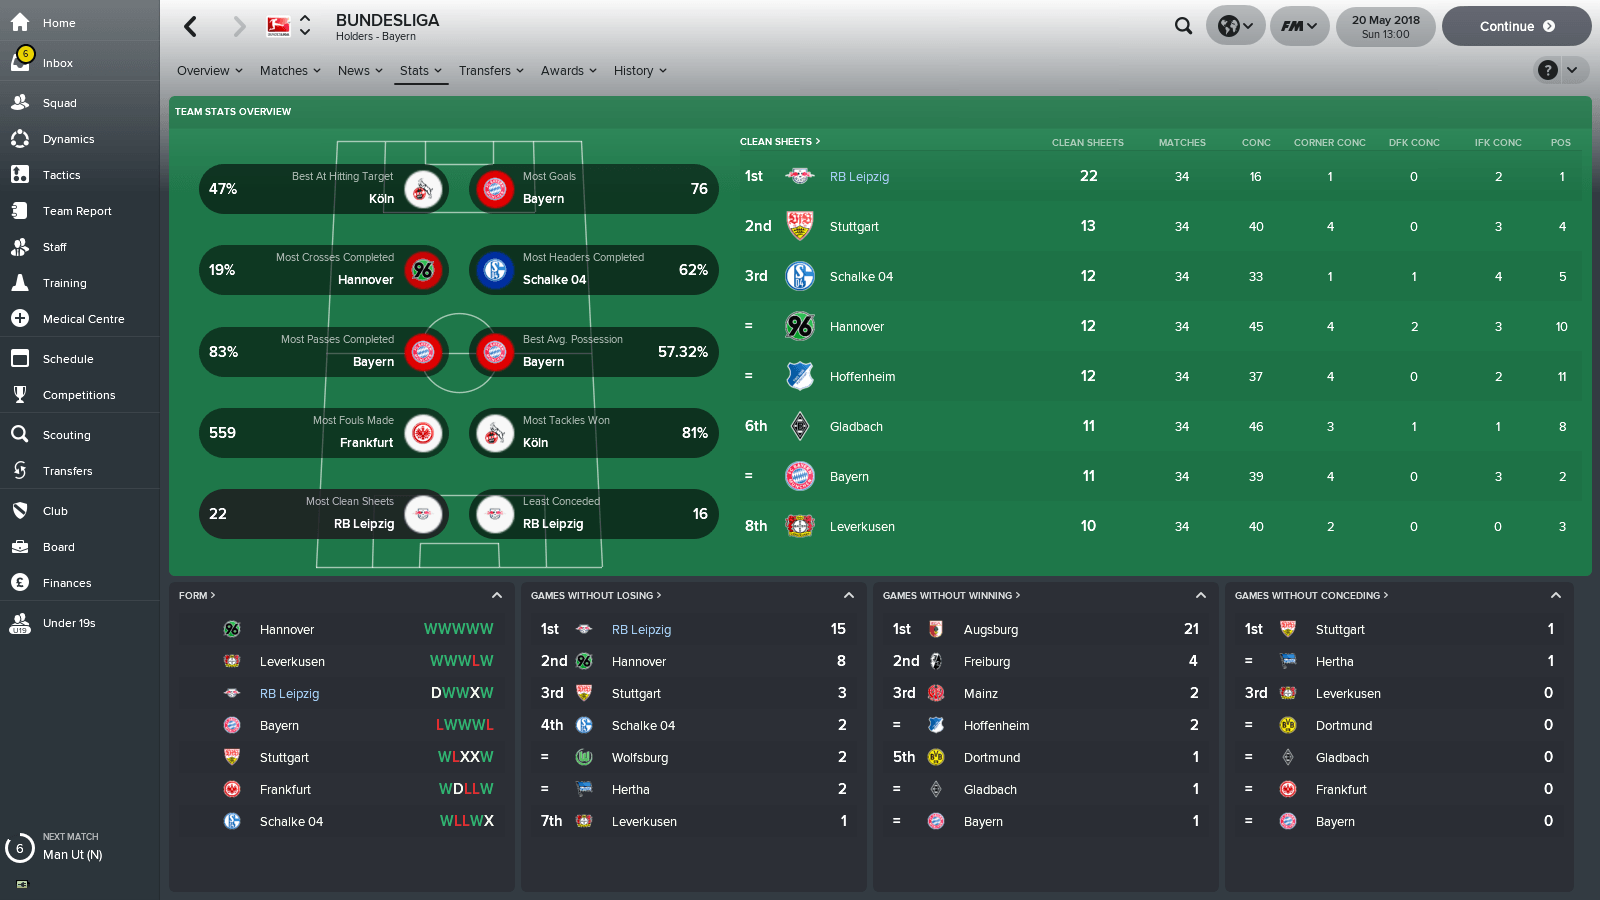
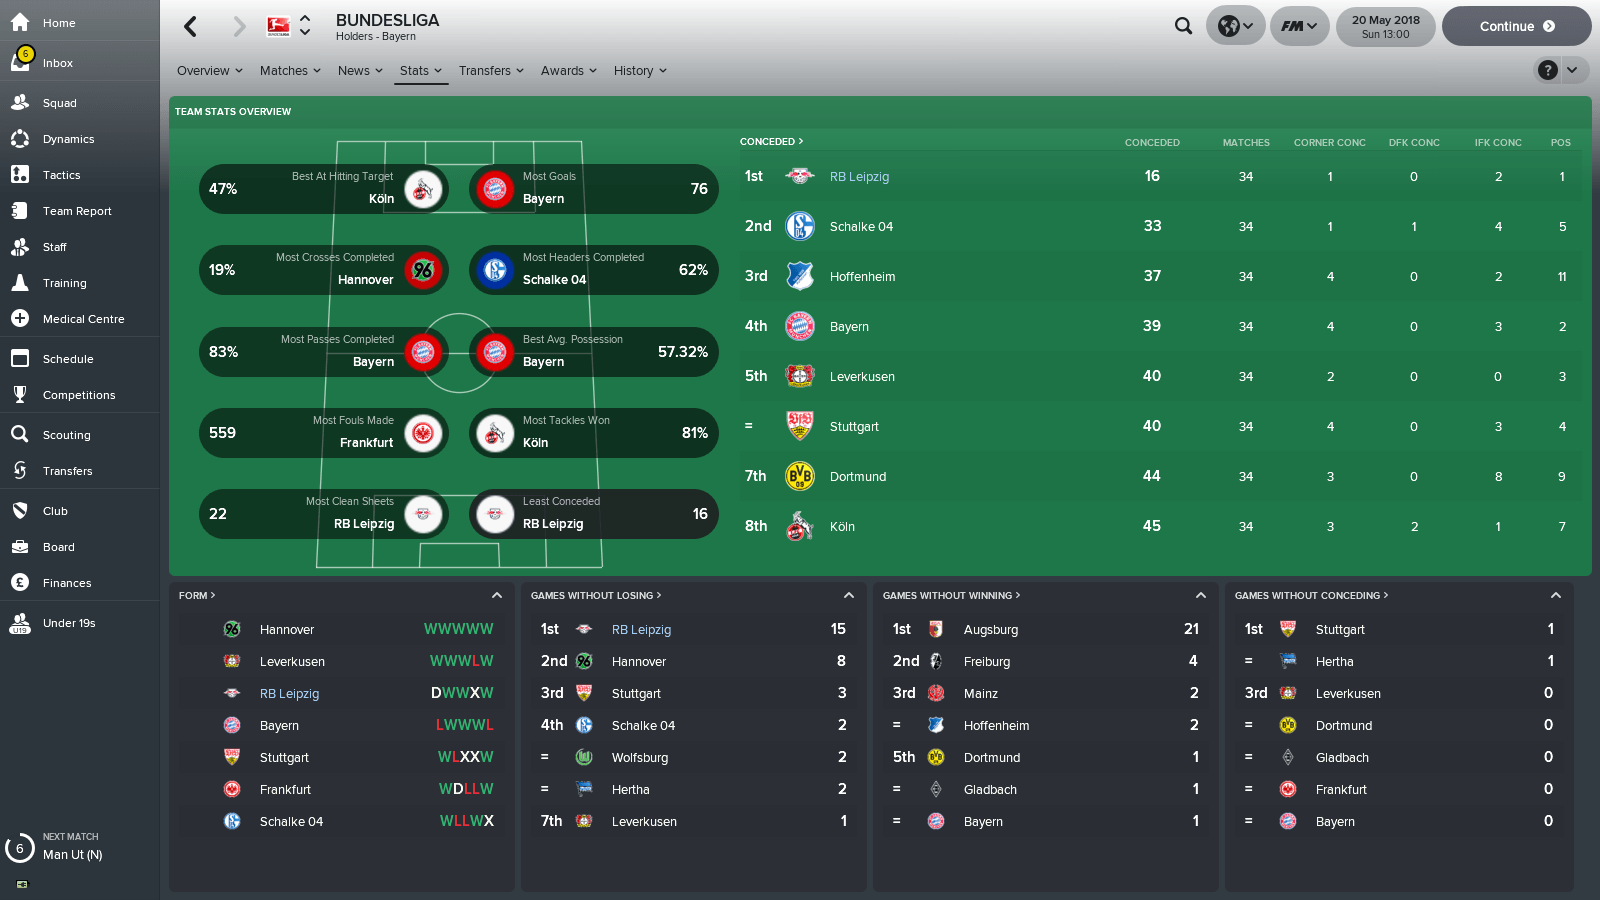
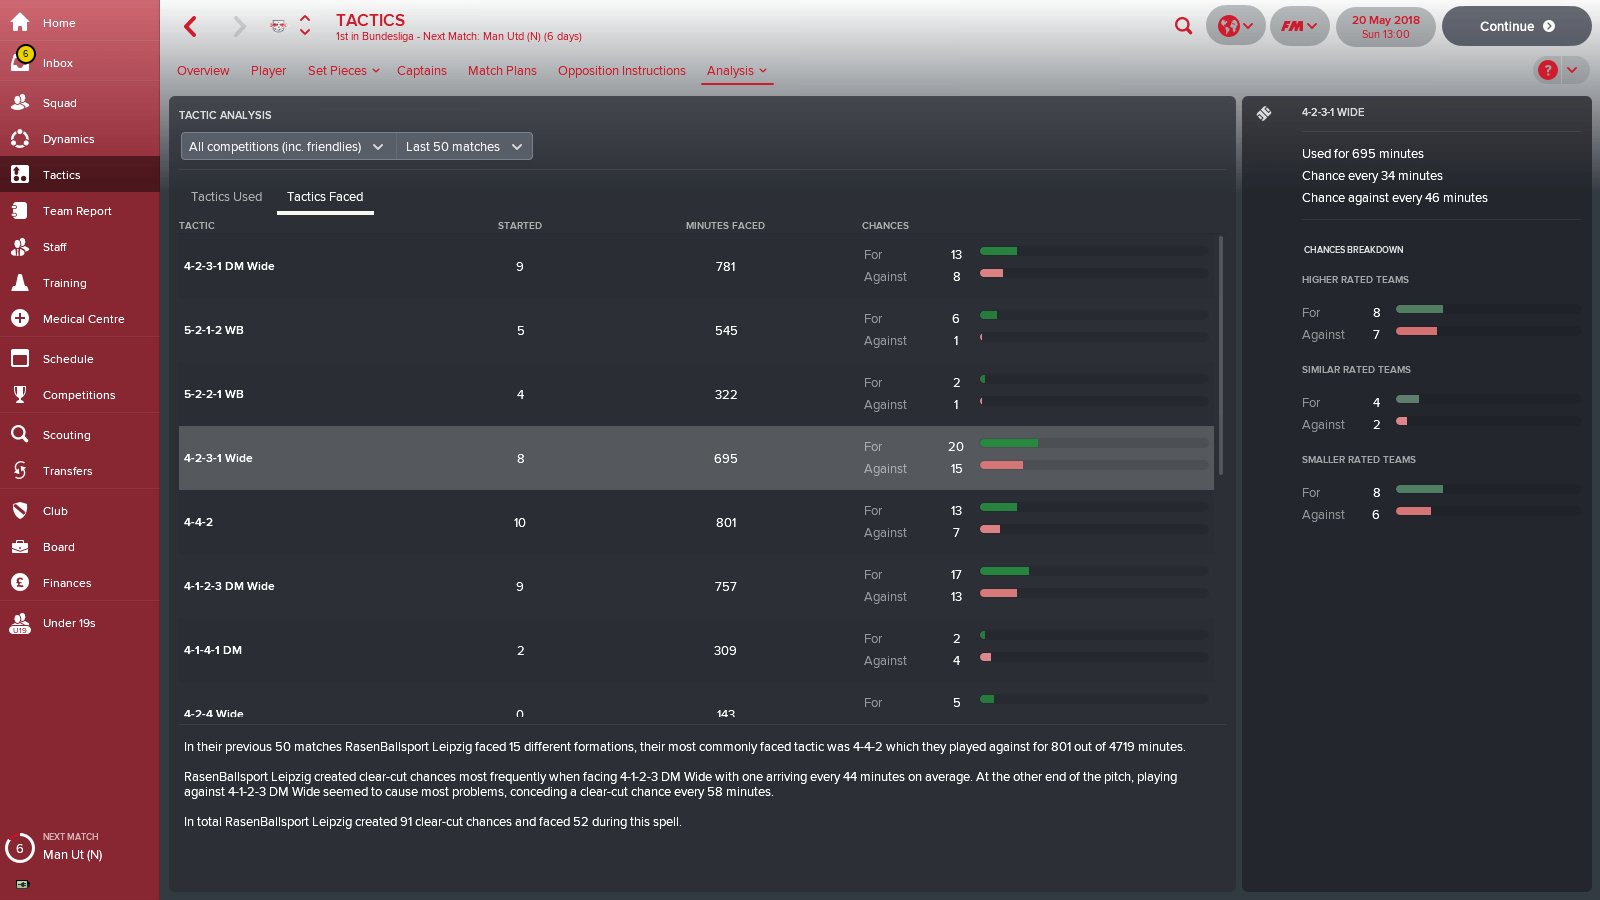
Analysis
Download Tactic
[lockercat]Click here[/lockercat]




Gran tactica para equipos medios que quieren progresar en resultados
Gracias.
Thank you.